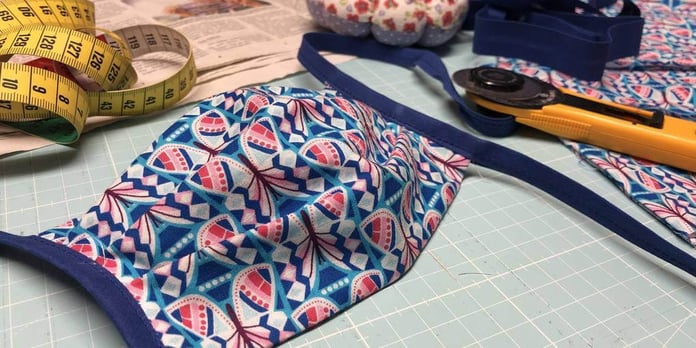
DARMSTADT – Sew a mouthguard yourself – this is almost a trend among sewing enthusiasts. But how easy is it to sew such a mouthguard as a beginner, which should then reduce the risk of infecting other people with Corona?
After the decision, the first hurdle comes. How does it work? Numerous instructions and videos can be found on the Internet. There is something similar in the newspaper. As you skim over the explanations, you have a look into the in-house sewing room: wire? Tapes? Rubber?
There are various already washed cotton fabrics in the closet. Washing is necessary so that the mask does not come on later. The decision is not an easy one: fabrics with butterflies, apples, plain and patterned. Which optics are the least noticeable? You always stand out with a face mask, at least with beautiful butterflies.
First cut a suitable piece with the large fabric scissors according to the newspaper instructions, then select a more precise pattern from the Internet as described. How does it go from here? Newspaper, video and online instructions do not match at the back and front. It’s too much stuff. What is this now? Read the instructions over and over again. Then the penny falls: the pattern is intended for a mouthguard with folds, but the newspaper later writes about a mouthguard with a central seam. This only makes sense in the second half of the text. It would have been better to read the instructions completely, but the photo also shows a different mouthguard. Lesson learned. Always read the instructions patiently before you can start.
So think again and let’s go. Cut fabric (two pieces, 17 by 17 centimeters each). Now lay on top of each other on the left and sew together on two opposite sides.
Attention! In the end, the butterflies should, of course, stretch their antennae upwards and not lie on the side of the mask. Sewing itself is quick: just go straight. Then turn the fabric to the right and bring the wrinkles into the face mask. First, fold at the height of 3.5 centimeters. No problem. Second and third fold “one centimeter”. An inch from where? The family’s sewing talent is also at a loss. She tries out all possible variants. Sometimes it’s too much, sometimes too little. Next time there will be only one big knockout of fabric that would never be enough for the mouth and nose. In the end, there are wrinkles, somehow. Who put it into the fabric remains a mystery.
The folds are fixed with the iron. Then the ribbons for attaching the mask to the head should follow. Fortunately, there is a box with lots of ribbons in the basement. Now just the tapes as in the video and … crap! The butterflies are the wrong way round. The straps come to the sides of the face mask, not the top and bottom. So open everything up again with the seam ripper and sew the other sides together.
The desire to sew the mouthguard is no longer particularly great. Do you really need that? But now the ambition mixes in the thoughts: “The thing is getting ready!” So all steps are repeated. The folds make no sense the second time. No matter. They are fixed, the tape is sewn on.
And then the time has come: a finished face mask. Doesn’t look too bad and it actually fits. It doesn’t cost a lot of money to make a mouthguard, but it takes a lot of nerve and patience – and almost two hours on the first try.


